Ai photo effects are based on your text queries, mark a part of the photo and describe what would you like to do with it. Easy as that!
Artificial intelligence (AI) has revolutionized the way we interact with photos. With AI-powered photo editing wiper.ai, it's now possible to add stunning effects to photos with just a few clicks. One of the most exciting developments in this field is WiperAI, a platform that offers cutting-edge AI capabilities for image processing. In this blog, we'll explore the possibilities of applying AI photo effects using OpenAI, how to write queries, and what can be done with this powerful tool.
How to write queries for Wiper.AI?
To use WiperAI for photo editing, you'll need to write queries that specify the type of effect you want to apply. The queries are written in a specific format called Wiper.AI's prompt format. Here's an example of a WiperAI prompt for applying an AI photo effect:
"Apply a retro filter to this image of a city street at night."
This query tells WiperAI to apply a retro filter to the image of a city street at night. WiperAI will then use its AI technology to generate a new image with the retro filter applied.
Or, like we did in this example:
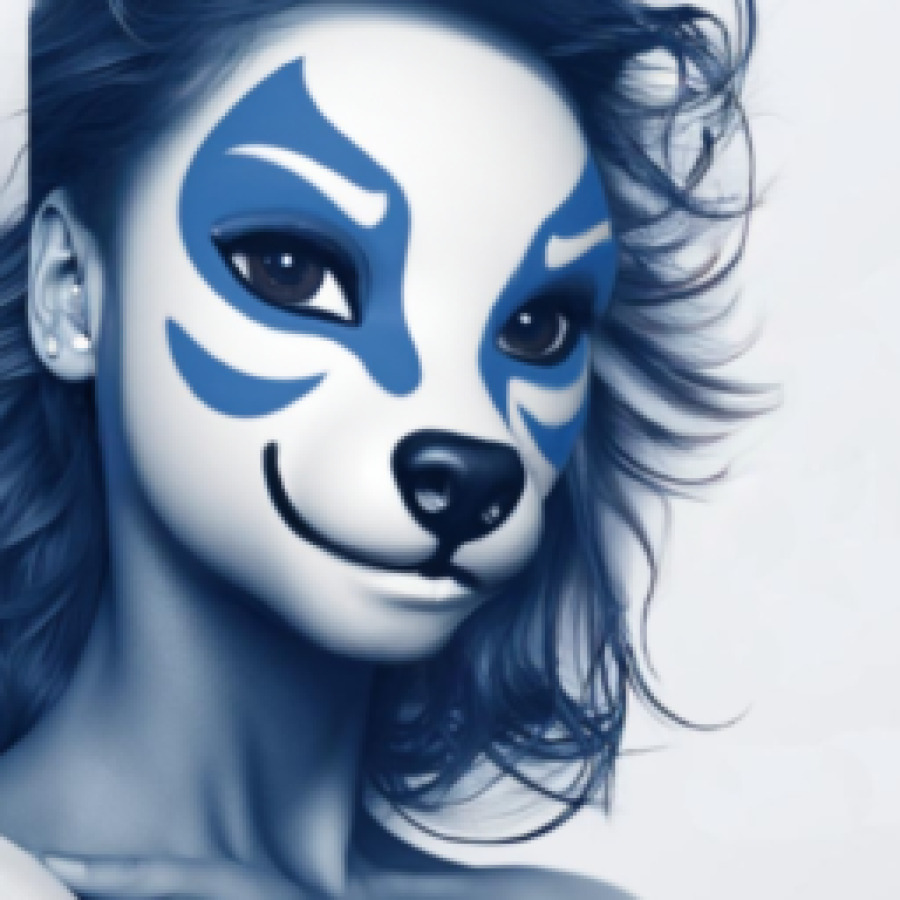
"make her face to look like a dog face from cartoon" and marked part of the image (face) will be transformed ad you can see in the video.
What can be done with WiperAI photo effects?
The possibilities of applying AI photo effects using WiperAI are virtually endless. Here are some of the most popular effects that can be applied using WiperAI:
- Colorization: Colorization enables you to add color to black and white images. This effect can be particularly useful for restoring old photographs.
- Noise Reduction: Noise reduction helps to remove noise from images. This can be especially useful for low-light photographs.
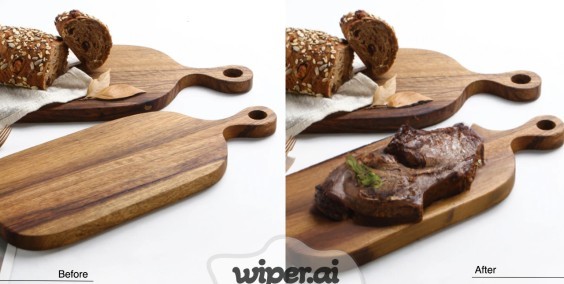
- Object Removal: Object removal enables you to remove unwanted objects from images. For example, you could remove a distracting person from a family photo.
- Super Resolution: Super resolution allows you to increase the resolution of an image. This can be useful for enlarging small images without losing quality.
- ....
How to do it in Wiper.AI
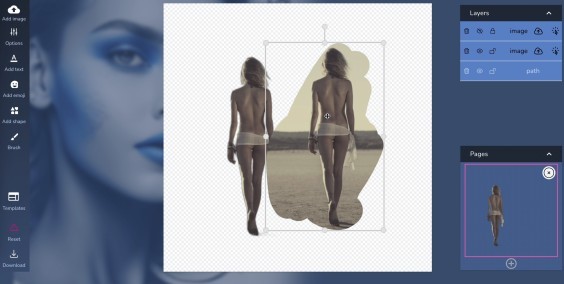
- Place a photo on canvas and make sure that it is covering the complete canvas
- Choose canvas templates (upper right corner) which has same width and height, like for example "Amazon product photo"
- Click on a brush tool on left toolbar menu
- Draw over the part of the image which you want to apply effect on
- Disable brush feature by clicking on it, the bursh icon needs to turn from red to white again
- Select drawing and the image, hold shift button and first click on the drawing and then on the image
- Click on the options icon in left menu bar and scroll down until you see input text field
- describe what you want to do with selected part of the photo
Here is the video tutorial: